|
Attach File |
  
|
| Show/Hide Hidden Text |
|
Attach File |
|
| Show/Hide Hidden Text |
To add documents to PaperSave using Attach File method, you need to follow below mentioned steps:
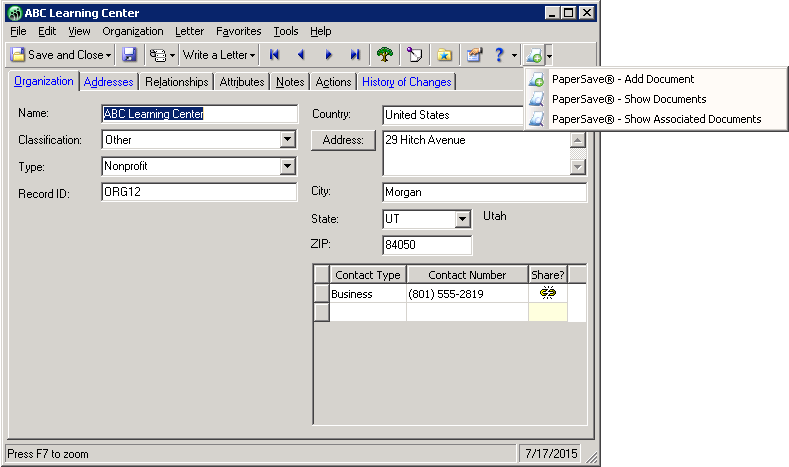
1. Open Host Application (here, Student Information System). Select the appropriate Transaction Type and related record to which you want to add the document. Expand PaperSave menu. Click PaperSave - Add Documents button as displayed below.
2. PaperSave Add New Document form will open as below. Click Attach File option available in the toolbar. Choose File to Upload window will open. Select the appropriate file and click Open.
 |
| Click on image to magnify/shrink |
3. Document will be added to PaperSave and you will be directed to Add A New PaperSave Document window as displayed below. You can view the document in the Document Display Area in the middle panel of the window. Moreover, if the selected document is Searchable PDF then you have the ability to select and copy the text using ctrl+c and paste it.
You can enter the value for the Profile Fields in the Document Profile pane available on the right side of the window. You will be able to view Submit to Workflow group in the toolbar, if Workflow exists for the selected Transaction Type. You also have the facility to submit the document directly to Workflow or Queue (whichever is applicable) by clicking Drop Point or Queue option under Submit To Workflow group.
 |
| Click on image to magnify/shrink |
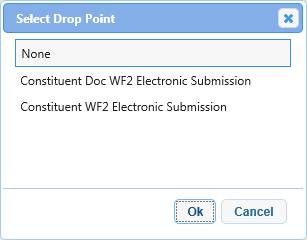
4. For Workflow Type 2.0, select DropPoint option. As you will select DropPoint Option, below displayed window will open prompting you to select the DropPoint from the available list. Select the Workflow and click OK.
5. For Workflow Type 1.0, select Queue option. As you will select Queue option, below displayed window will open prompting you to select Queue from the available list of Queues. Select Queue and click OK.

6. Thereafter, if you wish to add another document then click Save and New button or else click Save and Exit button to save the current document and exit the window.
This is how you can add a document using Attach File method.